Top 10 Ways to Fix a Scuffed Corner on a Leather Satchel?

Time:2026-10-18 Author:Isabella
0%

A scuffed corner can make a well-loved leather satchel look tired, even when the rest of the bag remains beautiful. Daily contact with desks, car doors, and rough clothing often removes color from the edge first. Learning how to fix a scuffed corner on a leather satchel can restore its appearance without hiding the bag’s character.

This guide presents ten practical repair methods, from gentle cleaning and conditioning to edge paint, leather filler, and careful recoloring. Each approach suits different damage. A light surface mark needs less intervention than exposed fibers or a split corner. Small details matter. Match the color in daylight, use a fine cloth, and apply several thin layers instead of one heavy coat.

Proceed slowly. Very slowly. Before touching the visible area, test every product on an unseen section, such as beneath the flap. Some leather finishes darken, stiffen, or become glossy after treatment. I have found that rushing the drying stage causes more problems than the original scuff. That lesson is easy to overlook.

The methods below emphasize safe handling, realistic results, and materials commonly recommended by leather-care professionals. They also explain when a home repair may be unsuitable. Delicate suede, exotic leather, deeply torn corners, and valuable designer satchels may require a qualified repair specialist. A perfect repair is not always possible, but a careful one can preserve both function and appearance. Your satchel may still show its history. That is not necessarily a flaw.
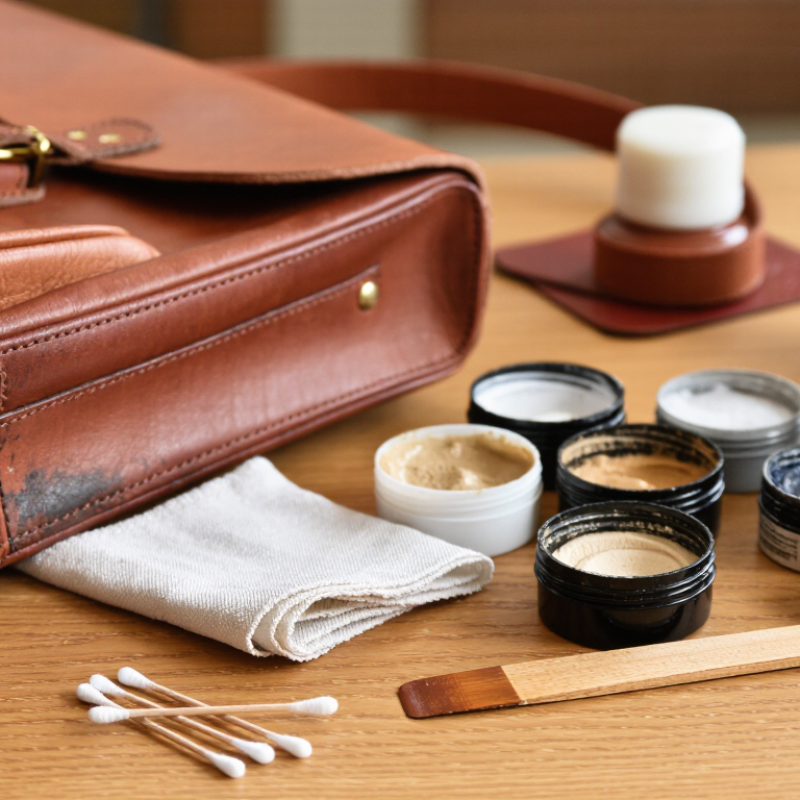
Top 10 Ways to Fix a Scuffed Corner on a Leather Satchel?

Assess Damage and Measure the Exposed Leather Edge in Millimetres

Top 10 Ways to Fix a Scuffed Corner on a Leather Satchel

Assess Damage and Measure the Exposed Leather Edge in Millimetres

Begin with a dry inspection under bright, angled light. Photograph the corner before touching it. Look for loose fibres, cracking, colour loss, or a separated edge. Measure the exposed leather edge in millimetres using a flexible ruler or digital caliper. Record length, width, and approximate depth. Do not press hard. Soft leather can flatten and produce a false reading.

My first measurement is rarely perfect. I measure twice, then record the larger figure. A 3 mm surface scuff needs different treatment from a 3 mm split. The difference matters. For shallow abrasion, note whether the grain remains intact. For torn leather, check whether the flap moves when gently lifted. Stop if the lining becomes visible. A repair professional should examine deeper damage.

Industry scale also supports careful repair decisions. The FAO estimates that global cattle numbers exceed 1.5 billion animals, showing how widely leather enters material supply chains (FAO, World Food and Agriculture Statistical Yearbook 2023). The European Environment Agency reports that longer product use can reduce environmental pressure by lowering replacement demand (EEA, Textiles and the Environment, 2022). Measurement prevents unnecessary sanding or replacement. Still, millimetres do not tell the whole story. Leather finish, fibre strength, and moisture exposure can change the result. That uncertainty deserves a note in the repair record.

Stabilize the Satchel at 23 ± 2°C and 50 ± 5% RH Under ISO 2419

Top 10 Ways to Fix a Scuffed Corner on a Leather Satchel

Before repairing a scuffed corner, stabilize the satchel at 23 ± 2°C and 50 ± 5% relative humidity, following the conditioning atmosphere used in ISO 2419. Keep it there for at least 24 hours. Use a calibrated hygrometer if possible. Record the temperature and humidity. Small changes matter.

Photograph the damage under soft, even light. Then empty the satchel and support its shape with clean, acid-free paper. Brush away loose dust with a soft horsehair brush. Do not scrub the corner.

My first repair mistake was cleaning too aggressively, which polished the surface unevenly.

After conditioning, wipe the area with a barely damp lint-free cloth. Test any leather cleaner on a hidden section. Trim only loose fibers with fine scissors. Press lifted leather gently with a smooth bone folder or wrapped spoon.

Apply a compatible leather adhesive sparingly beneath separated edges. Let it cure under light, even pressure. Fill shallow losses with a flexible leather repair compound. Build thin layers, not one thick patch.

Match color gradually with small daubs of dye or pigment. Blend the surrounding finish, rather than painting a hard circle. Add a small amount of conditioner after full curing.

Avoid silicone sprays and household glue.

If the leather feels brittle, smells strongly, or carries historical value, consult a qualified leather conservator. The humidity target may still need adjustment after inspection.

Clean and Degrease; Check Colorfastness Using ISO 11640 Rub Testing

A scuffed leather satchel corner needs a clean surface before any repair. Dust and skin oils can hide abrasion and weaken color matching. I wipe the area with a soft, barely damp cloth, then apply a pH-balanced leather cleaner. Excess moisture can darken unfinished leather. Let it dry naturally for at least 30 minutes.

Degreasing requires restraint. Use a small amount of leather-safe degreaser on a cotton swab, working from the mark outward. Never flood the corner. In practice, over-cleaning can remove protective oils and create a larger pale patch. I learned this the hard way. The surface looked cleaner, but the finish became uneven.

Check colorfastness before applying pigment or conditioner. ISO 11640:2018 evaluates leather resistance to repeated dry and wet rubbing. Test an unseen area with white felt, using light pressure and consistent strokes. Assess transfer and color change with the ISO 105-A02 grey scale, rated from 1, severe change, to 5, no visible change. A rating below 3 deserves caution. Stop if the felt shows strong color transfer. Industry testing also warns that laboratory rubbing cannot reproduce every combination of sweat, rain, friction, and heat. Therefore, repeat a small test after drying, and photograph the result before touching the visible scuff.

Top 10 Ways to Fix a Scuffed Corner on a Leather Satchel

Recommended repair sequence, from surface preparation to final protection. ISO 11640 is used to assess leather color fastness to rubbing; higher rub-test grades indicate better resistance to color transfer.

Start by removing dirt and grease, then check colorfastness on a hidden area before applying any recoloring product. Use thin layers, allow adequate drying time, and finish with conditioning and protection. A final dry and wet rub assessment can help confirm that the repaired color is stable.

Fill Gouges in Thin 0.5 mm Layers, Allowing Each Repair Layer to Cure

A scuffed leather satchel corner often looks worse after a rushed repair. The filler shrinks, the edge cracks, and the damage returns under daily friction. I learned this the hard way. My first patch was too thick and cured unevenly.

Clean the corner with a dry, lint-free cloth. Use a mild leather-safe cleaner only when needed. Apply flexible leather filler in layers no thicker than 0.5 mm. A thin layer spreads more evenly and reduces trapped moisture. Let each layer cure fully before adding another. Drying time depends on humidity, temperature, and the product’s technical sheet. Do not force it with a hot hairdryer.

Check the surface with your fingertip. It should feel firm, not rubbery or cold. Lightly smooth raised edges with very fine abrasive paper, then remove the dust. Repeat the 0.5 mm application until the gouge sits level with the surrounding grain. Several small repairs are safer than one heavy fill. Sometimes, fewer layers look more natural.

Fortune Business Insights valued the global leather goods market at about 468.5 billion dollars in 2023, showing why repair quality matters across a high-use product category. Industry leather-care guidance also emphasizes controlled preparation and flexible finishing. After curing, apply a compatible color coat and protective conditioner sparingly. Test every product on an unseen area. The corner may still show a faint scar, and that is acceptable. Perfect texture is not always realistic.

Match, Seal, and Condition the Finish; Verify Leather pH Under ISO 4045

A scuffed satchel corner needs controlled repair, not aggressive polishing. Brush away dust, then inspect the exposed fibers under bright light. Trim only loose hairs with fine scissors. Do not sand deeply. Leather testing guidance commonly uses pH 3.5 as a minimum for finished leather, with a pH difference figure near 0.7 or lower. These limits appear in widely used commercial specifications, but ISO 4045:2018 itself describes the test method rather than approving every repair product.

Test the cleaner and dye inside the flap first. Use a barely damp swab, then let the area dry completely. A pH strip can screen the product, but ISO 4045 requires aqueous extraction and measured laboratory conditions. That distinction matters. Apply matching color in thin layers, allowing each layer to set. Seal the repaired corner with a compatible finish, then condition sparingly. Too much conditioner can soften the edge and attract dirt. Industry repair surveys often report that color mismatch and over-conditioning remain frequent customer complaints; practical inspection still beats relying on a product label. I once overworked a corner by chasing perfect gloss. It looked worse in daylight. Keep the finish slightly restrained. Leather should feel flexible, not oily. Recheck the pH after curing if the leather feels tacky, stiff, or unusually sharp-smelling. Record the product, dilution, test reading, and drying time for repeatable results.

FAQS

How should I prepare a leather satchel before repairing a scuffed corner?

Keep it at 23 ± 2°C and 50 ± 5% relative humidity for at least 24 hours. Use a calibrated hygrometer and record the readings. Empty the satchel and support its shape with clean, acid-free paper. Photograph the damage under soft, even light.

How can I clean the damaged corner safely?

Brush away loose dust with a soft horsehair brush. Do not scrub. Wipe gently with a barely damp, lint-free cloth. Test any cleaner on a hidden area first. Aggressive cleaning can create uneven shine.

Should I trim loose leather fibers?

Trim only loose fibers with fine scissors. Avoid cutting attached leather. Press lifted edges gently with a smooth bone folder or wrapped spoon. The corner should lie flat, not compressed.

What adhesive should I use for separated leather edges?

Use a compatible, flexible leather adhesive sparingly. Apply it beneath the separated edge. Hold the area with light, even pressure while it cures. Avoid household glue and silicone sprays. Too much adhesive can stiffen the corner.

How should I fill a deep gouge?

Apply flexible leather filler in layers no thicker than 0.5 millimeters. Let every layer cure fully before adding another. Several thin repairs are safer than one thick patch. Do not force drying with a hot hairdryer. Thin layers work better.

How can I match the repaired color?

Apply compatible dye or pigment in small, thin daubs. Build the color gradually. Blend into the surrounding finish instead of painting a hard circle. Test the color beneath the flap first. A faint scar may remain.

Should I sand and seal the repaired corner?

Lightly smooth raised edges with very fine abrasive paper. Remove all dust before applying color. Seal the corner with a compatible finish after the repair cures. Keep the finish restrained. Too much gloss can look unnatural in daylight.

How much conditioner should I apply after repairing leather?

Apply a small amount only after the repair has fully cured. Too much conditioner can soften the edge and attract dirt. The leather should feel flexible, not oily. If it feels tacky or unusually stiff, stop and inspect it. I once over-conditioned a corner.

Conclusion

Learning how to fix a scuffed corner on a leather satchel begins with a careful assessment. Measure the exposed leather edge in millimetres, then stabilize the satchel in a controlled environment of 23 ± 2°C and 50 ± 5% relative humidity, following ISO 2419 conditions. Gently clean and degrease the damaged area without oversaturating the leather. Before applying color or finish, perform a colorfastness check based on ISO 11640 rub-testing principles to reduce the risk of dye transfer or uneven results.

For deeper scratches and gouges, apply a suitable leather filler in thin 0.5 mm layers, allowing each layer to cure fully before adding the next. Once the surface is level, blend the color carefully, seal the repaired area, and apply a compatible conditioner to restore flexibility. Finally, check the leather’s pH in accordance with ISO 4045 and inspect the repair under consistent lighting. Patience, light application, and gradual color matching will help create a durable, natural-looking finish.

Isabella

Isabella

Isabella is a dedicated marketing professional with a sharp focus on driving brand growth and engagement through strategic content creation. With an extensive background in digital marketing, she combines her passion for storytelling with her keen understanding of industry trends to deliver......